Thursday, June 30, 2011

2 Night Meal

Confession time: I love leftovers. They make my life so much easier, and often times, the food tastes as good or even better (hello, chili), the next day. Plus, when you make something really tasty, why would you only want to enjoy it once?

I will let you in on another little secret: I don't enjoy cooking when I have to do it, and that's what it feels like when I need to prepare a different meal every night; but I do enjoy and look forward to cooking when it is not a daily chore. That said, I love recipes that can get us through two meals or more. And this one, from Giada (the hubby's fav Food Network host), is sensational for leftovers.


Here's what you'll need:

  • 1 box jumbo pasta shells
  • extra-virgin olive oil
  • 1 small yellow onion, chopped
  • 3 cloves garlic, diced
  • 1 lb. ground turkey (beef will work well too)
  • 1/2 teaspoon salt, plus 1/2 teaspoon
  • 1/4 teaspoon black pepper, plus 1/4 teaspoon
  • 1 package frozen artichokes, or one can/bottle (approximately 14 oz.) marinated artichoke hearts 
  • 1 (15 oz.) container ricotta cheese
  • 2 eggs, lightly beaten
  • 1/4 cup chopped fresh basil
  • 2 Tablespoons chopped fresh parsley 
  • Grated mozzarella to taste
Here's how you put it together:
  • Bring a large pot of salted water to a roiling boil. Add the pasta and cook according to package directions, and drain. Set aside.
  • Meanwhile in a large skillet, heat olive oil over medium-high heat and add onions and garlic, cooking until the onions are soft and starting to brown, about 5 minutes.
  • Add the ground turkey, 1/2 teaspoon salt, and 1/4 teaspoon pepper and continue to cook until turkey is brown. Remove from heat and let cool. 
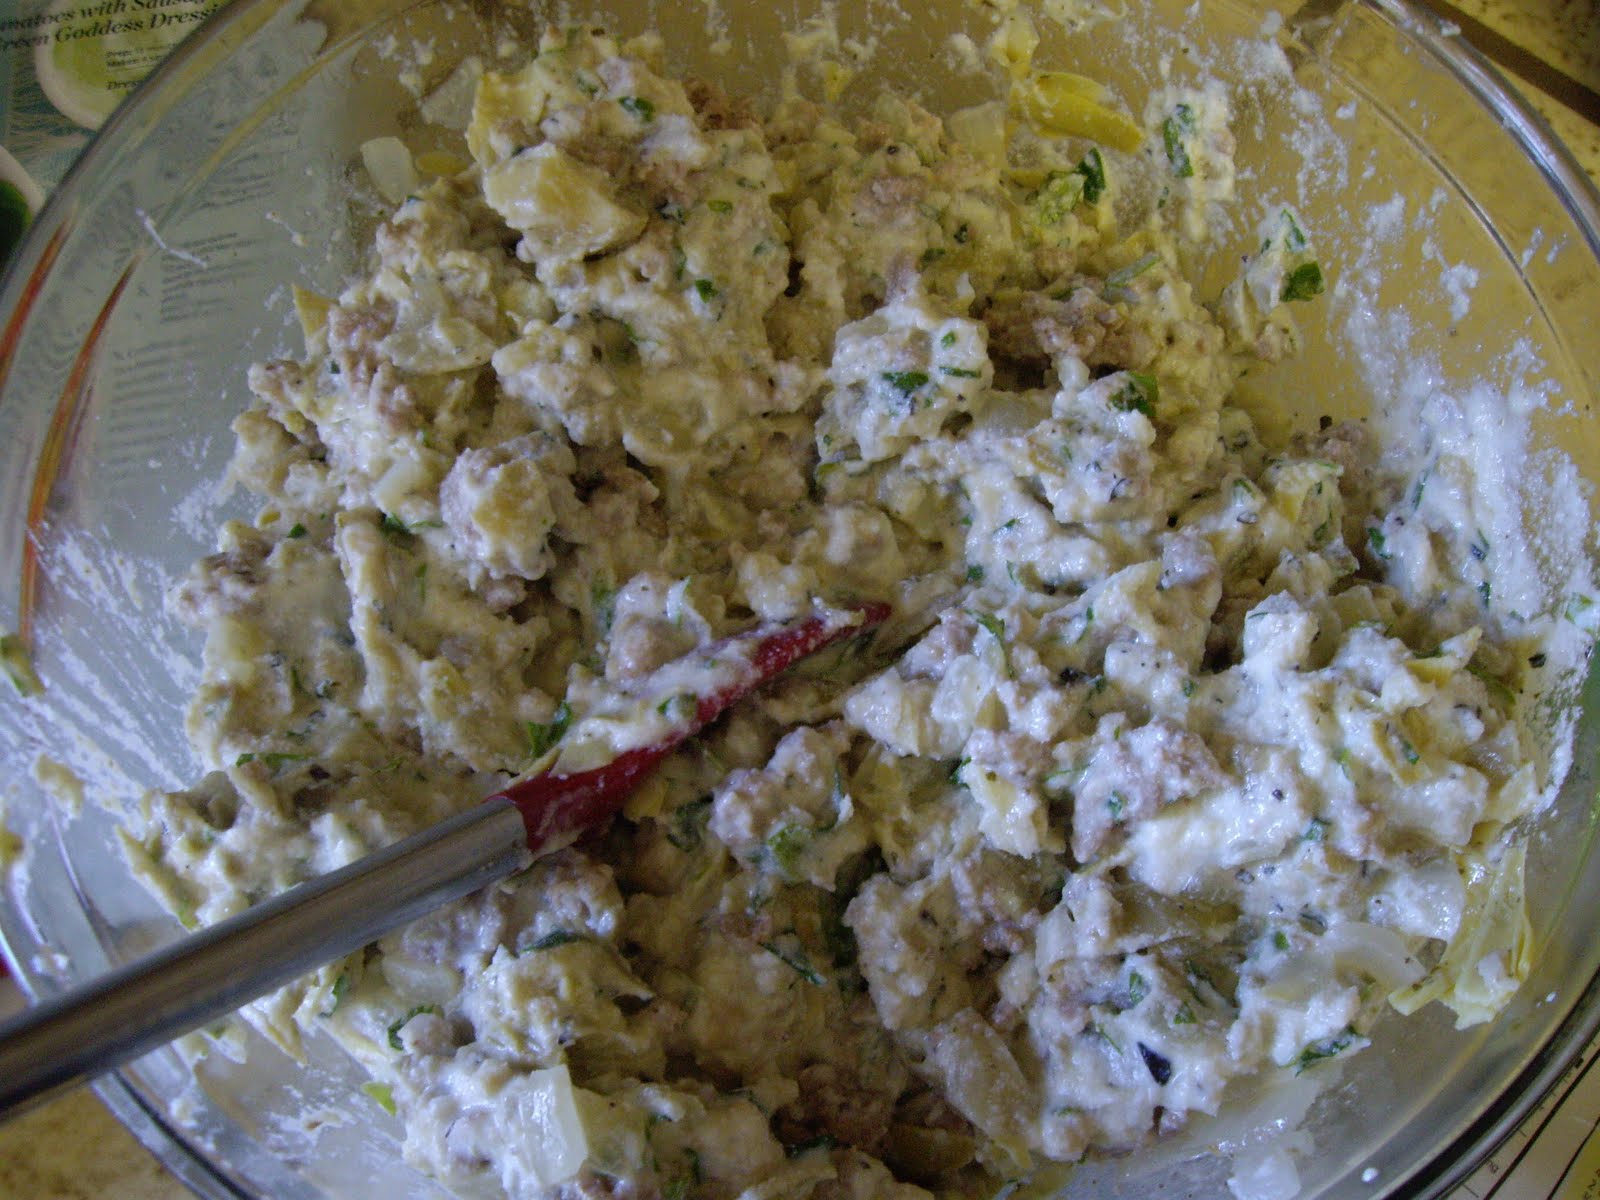
  • In a large bowl, combine the cooled turkey mixture, ricotta, eggs, basil, parsley, and remaining salt and pepper. Stir to combine. 


  • To stuff shells, cover the bottom of a lasagna dish with 1 cup of Arrabiata sauce (recipe to follow). Take a shell in the palm of your hand and stuff it with a large spoonful of the turkey mixture. Place stuff shells (12-14) in the lasagna dish.
  • Drizzle the leftover sauce over the shells, top with the grated mozzarella to your preference.
  • Bake at 400 degrees for 25 minutes or until golden brown. (Note: This recipe will freeze for up to a month. If freezing, cook at 400 degrees for 1 hour or until the shells are cooked through.
Now for some doctored Arrabiata Sauce...
  • extra-virgin olive oil
  • 2 cloves garlic, diced
  • 2 teaspoons crushed red pepper flakes
  • 6 oz. of panchetta (optional but yummy)
  • 5 cups jarred marinara sauce
Heat the olive oil over medium heat. (I use the same skillet I used to brown the turkey just to cut down on dishes and reuse some of the flavors from the filling.) Add the panchetta, if using, and saute until golden brown, about 5 minutes. Add the garlic and saute for another minute. Add the sauce and crushed red pepper and bring to a simmer. 

Note: You could definitely definitely just use straight out of a jar sauce, but I like to use the arrabbiata sauce when making this dish with turkey, as turkey can be rather bland, and this doctored sauce adds some flavor and spice to the dish. 


What make ahead or leftover dishes are your go-to dishes? Let me know so I can file them away for the school year!

Wednesday, June 29, 2011

Painted Bookshelf

 After a couple setbacks, namely not being able to upload pictures for Monday's post and being clueless about reassembling furniture, I am back with an update on this guy. When we first met, he was black.


Not bad, but a little too sleek and not our style.

First I primed him with a water-based primer since it was solid wood, not laminate. (I skipped the sanding step because he was in really good condition. Smooth finish with no knicks or scrapes.)


You can see it was an imperfect coat. My goal was just to white out the original black paint. But it was hard to maneuver around all the ladder-like pieces in the back, so I decided to take it apart before applying two coats of semi-gloss white paint; I was concerned about the least amount of brush strokes showing as possible.


Once apart, it was time for two coats of semi-gloss white paint. I used Pratt & Lambert Designer White (right off the shelf), since I already had that on hand from a project at our old place. I applied two coats to the side showing, waited 24 hours until I was sure the paint was dry, and then flipped it and applied two more coats to the side that was originally face down.

In all honesty, it could have used a third coat, but I am not sure it will stay white and I was feeling impatient.

Then I waited another 24 hours before putting it back together. Here's where I ran into trouble. After grunting and sweating, trying to screw tiny screws into awkward corners, I ended up with this.


It might be hard to tell from the photo above, but the shelves were sloping down, which pretty much ensured that anything I put on the bookcase would slide right off. Not exactly what I was hoping to accomplish.

It turns out that I had attached the shelves to the L-brackets incorrectly. I had the L-brackets upside-down, making the back of the shelf much higher than the front. See the pic below to get a sense of what I am talking about.


When the hubs made the discovery (yep, I couldn't even figure out what was wrong), I was so tired that I had to give it another 24 hours before attempting to amend the mistake, which incidentally looks like this.


But amend I did. And today the bookcase stands tall and proud with perfectly flat shelves.


The moral of this story is when something seems harder than it should be, there's probably a logical explanation. In my case, the shelves would topple over like dominos while I was trying to attach each new shelf. Instead of stopping to think about why this was happening, I sat with the shelves between my legs to keep them from falling over and scuffing my paint job. I kept thinking, "Man, this is hard," but I pushed through, and it took about three times as long to do it wrong as it did to do it right. I hope I never make this kind of mistake again, but if it involves assembling furniture, I just might - especially if I don't get a manual!

Anywho, now all I need to do is move the shelf into it's new home, the guest bedroom, and style it up with Ryan's books and whatever objects I can find laying around. Sounds like a good Thursday project.

Until then...

Friday, June 24, 2011

The Perfect Summer Salad

I love Caprese salads and sandwiches, and I always get excited when our homegrown tomatoes come in because we get to eat Caprese till our bellies content. So imagine my delight when I ran across this fresh mozzarella, avocado, roasted corn, and tomato salad. It's a California take on the classic Caprese, and it is *perfect* for summer.


Ingredients:

  • 4 ears sweet corn in the husk
  • 1/2 lb. fresh mozzarella, cut into bite-sized cubes, or boccoconcini
  • 2 avocados
  • 1/2 pint cherry or grape tomatoes, halves
  • 8-10 basil leaves, cut into thin strips
  • Several handfuls of your favorite lettuce variety
Directions:
  • Preheat the oven to 400 degrees. While the oven is preheating, soak the corn, husk still on, in water for 15-20 minutes.
  • Roast corn with husk still on for 20-25 minutes on a baking sheet, or until kernels are tender.
  • Cool, then remove corn from husks.
  • Cut off the kernels and add to your salad bowl.


  • Chop and add the following: Mozzarella
  • Tomatoes
  • Avocados
  • Basil
  • Lettuce
  • Toss with Summer Herb Vinaigrette (see recipe below) and enjoy! 
Summer Herb Vinaigrette
  • 1/2 cup red wine
  • 2 teaspoons Dijon mustard
  • Grated zest and juice of one lemon
  • 2-3 fresh basil leaves, cut into thin strips
  • 2 Tablespoons chopped fresh oregano leaves
  • 2 Tablespoons chopped fresh flat-leaf parsely
  • 3/4 cup extra virgin olive oil
Combine all ingredients but olive oil in a small bowl. Whisk in olive oil in a slow, steady stream until all of the oil is incorporated. Season with salt and pepper to taste. 

*Note: One batch of the dressing is enough for three separate salads. I imagine it would also work well with other summery salads. 

With all of this warm weather (finally!), I have been in the mood for fresh salads from our garden, like this recipe above. What salad combos are you loving these days? Is there a dressing that I just have to try? Send your faves my way! 


Thursday, June 23, 2011

Are We Crazy?

Before you say "yes" right off the bat, here's the real question: Are we crazy for wanting to re-texture the walls in our house before we paint? We hate the orange peel texture of our walls, and would love to take them from this:

To this.


But the desired texture (on the right) is tons of work. We first have to prime the walls so the mud will stick to them, then skim coat them (not sure how many coats), sand, and finally paint at least two coats. Sounds daunting to me. But then again, so does painting once, only to do all this work down the road.

Has anyone skim coated textured drywall before? Is it hard? I am dying to know what we are contemplating getting ourselves into here.

Wednesday, June 22, 2011

Pretending to Be Emily

Yesterday I told you all about my newest obsession: Emily Henderson's HGTV show Secrets From a Stylist. Emily gets most of the furniture on the show from flea markets and second hand shops, and man, does she get some deals. While there are no flea markets around here (at least not any that I know of), there are a ton of second hand shops. So I put on some jeans, cute new shoes, and a plaid shirt so I could really fancy myself as Emily, and I went out searching for some new-to-me treasures.

I hit up 17th Street in PG first since it has a few thrift stores and a vintage clothing store, but nothing was calling out to me, so I headed over to Patrick's Consignment where I found some things that were hard to pass up.


I would love to use these side tables in the master bedroom. I love that they are leggy and have drawers, but they are curvy and not square. I would jazz up the space between the drawers with some books and accessories. Oh, and they are matching! But at $155.00 each, they are way out of our price range, especially since I plan on painting the night stands that we eventually get.


Look beyond that shaded sconce at that large-and-in-charge mirror. I would love to put this guy behind the dining room table to break up the expanse of wall and bounce some light around. It's square, but the circle detailing at the top softens it up enough that the room could handle yet another piece with hard edges. But again, it's out of our price range. (I know it was $200+, I think even closer to $300.)

The verdict: Patrick's it great, but the prices make it prohibitive. So next up was the Cannery Row Antique Mall, which I also thought would be out of our price range. Some pieces were, and some were not. Here's what caught my eye.

Some glasses for the bar area.


A sculptural vase.


Some empty seltzer and apothecary bottles.


An oval mirror that has a weathered look. I think it would balance out the clean, modern lines of the dresser in the master.


This funky little pulley lamp that unfortunately was $100.


And I can't get this ceramic lamp out of my head. I think spray painted a crisp white, the squares would complement our comforter. At $15.00, I was really tempted to bring it home, but I was worried that paint wouldn't adhere to it well, and frankly, I want two lamps for the master.


This simple shelving unit did makes it way home with me. It was a steal at $30, and we really need a bookshelf for the guest bedroom that it begging to be organized. I think the airy shelving will help soften up the heavy oak desk in there that my husband is so attached to. Here's hoping.


I am working on painting it a glossy white this week. The primer is done. I'll let you know when it's finally done.

What new-to-you pieces have you brought home recently? If you are in this area, what thrift stores do you frequent?

Tuesday, June 21, 2011

Jumping On the Bandwagon: Emily Henderson

The blog world has been buzzing for a few months about Emily Henderson, an HGTV Design Star winner and the brains behind their new show Secrets From a Stylist.


But since I don't have TV, I didn't really sit up and take notice - at first. Then my favorite bloggers started posting about it: Michelle at Ten June posted about the show here, followed by Modern Jane here. Last week Michelle was back to interview Emily (which you can find here), and Young House Love punctuated the week by talking about the show here.

At this point, I really couldn't ignore the buzz any longer; I just had to see what all the hype was about. Lucky for me, HGTV has full episodes online (since you all know we don't have cable), and I watched the first season in a record 4 days. Thank you, summer!

Emily is just adorable! She is sweet and peppy without being saccharine thanks to a big dose of quirky and down-to-earth. And like her multi-faceted personality, I love how she layers different styles in a space to create a look that is interesting, personal, and curated.


It's a lesson I could definitely use so my house does not become a mid-century modern museum. Here's what my instinct would be...


And here's the final product thanks to Emily's layering genius.


So much more textural and visually interesting, even if it is a bit out of my comfort zone.

Plus, I love how she finishes a room with art and by styling shelves and other surfaces with books, flowers, and other curiosities.


Oh, and she finds the most awesome sofas. Witness these two beauties.


Her sense of color is really keen too. (Watch me attempt to complement myself here.) Check out those ochre walls that she featured in look 2 of the first episode.


Do they look familiar?

Oh, and I want to steal all of her vintage blouses, flowered dresses, high-waisted bell bottoms, and her jackets. I am starting to think the show is as much about fashion as it is furniture.

(By the way, all photos via Emily's website, which you can check out here.)

I'll be back tomorrow to share how I fancied myself as Emily over the weekend.