Showing posts with label recipes. Show all posts

Thursday, July 28, 2011

Worst Recipe Post in History

Remember how I said the other day that a recipe I had hoped to blog about totally bombed? Well, maybe you don't remember me saying that, which would be good...because today I am going to write about that very recipe. Only I don't have pictures for you; I deleted them the night I made it because I didn't think it turned out. Then this miraculous thing happened: I let it set overnight, and the whole thing came together and was delicious.

So without further ado, here it is: Paula Deen's Gooey Butter Cake, which we have been calling Ooey Gooey. (Disclaimer: Although I almost always bake from scratch, this recipe uses boxed yellow cake. If you are a baking snob like me, you might not want to read any further.)


Ingredients:

Cake:
  • 1 18-1/4 oz. box of yellow cake mix
  •  1 egg
  • 8 Tablespoons butter, melted
Filling:
  • 1 8 oz. package of cream cheese, softened
  • 2 eggs
  • 1 teaspoon vanilla
  • 8 Tablespoons of butter, melted
  • 1 16 oz. package of powdered sugar
Directions:

Preheat the oven to 350 degrees. While oven is heating up, mix the ingredients for the cake with an electric mixer. Spread in the bottom of a 9 x 13 baking dish.

In a large bowl, beat the cream cheese until smooth. Add the eggs, vanilla, and butter, beating until combined. Then add the powered sugar slowly, mixing well. 

Spread over cake mixture and bake for 40-50 minutes. (I went 50 mins, and it was still pretty gooey.) Here's the most important part: restrain yourself and really let this guy cool down or it won't set up and it will be gross. It will also burn the roof of your mouth off and make it impossible to enjoy food for two days while your body is regenerating new skin. Was that too much info? Sorry. I just don't want you all to fall into the same trap I did. 

Two more quick warnings: one, this dessert is super sweet, so a little goes a long way. Don't binge or you will have a wicked tummy ache. Second, be prepared for your husband to fall even more in love with you because you finally relented and made him something by Paula Deen, the undisputed queen of Southern cooking. 

Okay, you've been warned. Go forth and bake! 


Thursday, June 30, 2011

2 Night Meal

Confession time: I love leftovers. They make my life so much easier, and often times, the food tastes as good or even better (hello, chili), the next day. Plus, when you make something really tasty, why would you only want to enjoy it once?

I will let you in on another little secret: I don't enjoy cooking when I have to do it, and that's what it feels like when I need to prepare a different meal every night; but I do enjoy and look forward to cooking when it is not a daily chore. That said, I love recipes that can get us through two meals or more. And this one, from Giada (the hubby's fav Food Network host), is sensational for leftovers.


Here's what you'll need:

  • 1 box jumbo pasta shells
  • extra-virgin olive oil
  • 1 small yellow onion, chopped
  • 3 cloves garlic, diced
  • 1 lb. ground turkey (beef will work well too)
  • 1/2 teaspoon salt, plus 1/2 teaspoon
  • 1/4 teaspoon black pepper, plus 1/4 teaspoon
  • 1 package frozen artichokes, or one can/bottle (approximately 14 oz.) marinated artichoke hearts 
  • 1 (15 oz.) container ricotta cheese
  • 2 eggs, lightly beaten
  • 1/4 cup chopped fresh basil
  • 2 Tablespoons chopped fresh parsley 
  • Grated mozzarella to taste
Here's how you put it together:
  • Bring a large pot of salted water to a roiling boil. Add the pasta and cook according to package directions, and drain. Set aside.
  • Meanwhile in a large skillet, heat olive oil over medium-high heat and add onions and garlic, cooking until the onions are soft and starting to brown, about 5 minutes.
  • Add the ground turkey, 1/2 teaspoon salt, and 1/4 teaspoon pepper and continue to cook until turkey is brown. Remove from heat and let cool. 
  • In a large bowl, combine the cooled turkey mixture, ricotta, eggs, basil, parsley, and remaining salt and pepper. Stir to combine. 


  • To stuff shells, cover the bottom of a lasagna dish with 1 cup of Arrabiata sauce (recipe to follow). Take a shell in the palm of your hand and stuff it with a large spoonful of the turkey mixture. Place stuff shells (12-14) in the lasagna dish.
  • Drizzle the leftover sauce over the shells, top with the grated mozzarella to your preference.
  • Bake at 400 degrees for 25 minutes or until golden brown. (Note: This recipe will freeze for up to a month. If freezing, cook at 400 degrees for 1 hour or until the shells are cooked through.
Now for some doctored Arrabiata Sauce...
  • extra-virgin olive oil
  • 2 cloves garlic, diced
  • 2 teaspoons crushed red pepper flakes
  • 6 oz. of panchetta (optional but yummy)
  • 5 cups jarred marinara sauce
Heat the olive oil over medium heat. (I use the same skillet I used to brown the turkey just to cut down on dishes and reuse some of the flavors from the filling.) Add the panchetta, if using, and saute until golden brown, about 5 minutes. Add the garlic and saute for another minute. Add the sauce and crushed red pepper and bring to a simmer. 

Note: You could definitely definitely just use straight out of a jar sauce, but I like to use the arrabbiata sauce when making this dish with turkey, as turkey can be rather bland, and this doctored sauce adds some flavor and spice to the dish. 


What make ahead or leftover dishes are your go-to dishes? Let me know so I can file them away for the school year!

Tuesday, April 12, 2011

Vanilla Coconut Cupcakes with Coconut Frosting

This one is going out to my closet male readers who have requested more recipes. You know who you are.

I made a yummy Sunday dinner for my mom: roasted chicken, mashed potatoes, a salad with our homegrown lettuce, and these vanilla coconut cupcakes for dessert. I really wish I could share the roast chicken recipe, but it is not public domain; it's from the Big Sur Bakery Cookbook, and since it's my favorite restaurant and a local institution, I don't really feel okay about about pilfering their copyrighted recipe. I will highly encourage you to grab a copy of the cookbook. Every recipe I have made is delicious. You won't be disappointed!


One quick word on roasting chicken or any foul - brining for at least 6 hours, but preferably overnight, is the key. It comes out moist every time guaranteed, regardless of weather you roast in the oven or throw it on the BBQ. Everyone will think you are a culinary genius, but it is so simple and easy!

Okay, on to dessert.

Here's the final product...

Recipe from Epicurious.com

The first step is to reduce your coconut milk by boiling two 13 to 14 oz cans of unsweetened coconut milk over medium high heat. The coconut milk will boil up high, at which point reduce the heat to medium low and boiled until reduced to 1-1/2 cups, or until it looks like this:


Now it's time to work on the cupcakes.

Ingredients for cupcakes:
2 cups all purpose flour
2-1/4 t baking powder
1/2 t salt
3/4 (1-1/2 sticks) unsalted butter, room temperature
1-1/3 c sugar
3 large eggs
1-1/2 t vanilla extract

1 c reduced coconut milk (see above)

Directions for cupcakes:
Preheat the oven to 350 degrees and line 1/3 cup cupcake tin with paper liners. Whisk dry ingredients (flour, salt, backing powder) in a bowl and set aside.

Using an electric mixer, beat butter in a large bowl until smooth.


Add sugar; beat on medium-high speed until well blended, about 2 minutes. (No picture. Sorry.) Add 2 eggs, one at a time, beating well after each addition and occasionally scraping down the sides of the bowl. Beat in vanilla and remaining egg. Add 1 cup reduced coconut milk.

Mix in half of flour mixture on low speed until just blended. Scrape down sides of the bowl and add remaining flour mixture, again mixing on a low speed until just blended.

Divide batter among cupcake tins.


Bake cupcakes until tops spring back when gently touched and/or fork inserted into the center comes out clean, about 20 mins. Cool completely before frosting.

Speaking of frosting...

Ingredients for frosting:
1 c (2 sticks) unsalted butter, room temperature
2-1/2 c powdered sugar
1/3 c reduced coconut milk, room temperature
1-1/2 t vanilla extract
1/8 teaspoon salt
1-1/2 cups sweetened coconut, lightly toasted (for garnish)

Directions for frosting:
Beat butter using an electric mixer until smooth. Add sugar, coconut milk, vanilla extract, and salt. Beat on medium-low speed until blended, scraping down the sides of the bowl. Increase speed to medium-high and beat until light and fluffy.


Frost cooled cupcakes using a knife or pastry bag.


Sprinkle toasted coconut over the top. Enjoy!


Thursday, April 7, 2011

Creamy Potato Salad with Lemon and (Fresh) Herbs

My husband *loves* mayo. It is definitely his favorite condiment - so much so that our friends got him a Costco-sized tub of it for Christmas one year - and quite possibly his favorite food. Of course, it is one of my least favorite foods. I have never taken a liking to potato salad or macaroni salad, despite my love of carbs, because it is always smothered in mayo.

Why do I bring up the great mayo debate that is constantly raging in my house? Because I have hit on a potato salad recipe that miraculously pleases both a mayo lover and hater, thanks to the mayo being tempered by bright herbs and zesty lemon. With BBQ's everywhere being fired up on these breezy spring evenings, with herbs growing in freshly planted gardens, and with summer gatherings just around the corner, there is no better time to get your mayo on with this twist on the classic potato salad.  

Ingredients
3 lbs baby red potatoes (other varieties like Russets and creamers will work too)
3 T unseasoned rice vinegar
3/4 c mayo
3 medium green onions, thinly sliced
1 celery stalk, cut into 1/3 inch cubes
1/4 c fresh parsley (or 1/8 c dried)
1/4 c fresh basil (or 1/8 c dried)
2 T dill (or 2 t dried)
1-1/2 t lemon zest
salt and pepper to taste

Directions
Bring quartered potatoes (or 3/4 inch chunks if using larger varieties) to a boil, and simmer until potatoes are tender, about 10-15 minutes. (I like the use the fork trick on them: if the fork penetrates the potato easily, but before it falls apart, they are tender.) Drain and let cool for at least 20 minutes.


Season potatoes with salt, pepper, and vinegar. Add all remaining ingredients; toss.


Season again with salt and pepper to taste. Cover and chill. Can be made ahead and keeps well for about 5 days. It's great with anything grilled. We had it last night with pork chops, and will eat it again tonight with some sausages.

Oh, and if you need a little boost on this Thursday, check out this link: http://www.reddit.com/r/AskReddit/comments/gibxk/i_like_big_butts_and_i_cannot_lie_but_is_there/
Thanks, Meg! I can't stop laughing!

Monday, March 7, 2011

Quiche Madness and the Art of the Pie Crust

This weekend was an exciting one: we celebrated Megan's bridal shower on Saturday. She and her fiance are so sweetly excited for their wedding, which is shaping up to be heartfelt and personal - full of Matt and Meg touches. I can't imagine a more gracious bride, so it was a joy to spend the day celebrating her!

First we feasted on quiche, which I provided, washed down with lots of Prosecco and cupcakes. Then to top it all off, we took over a salon for manis and pedis. After a crazy month, and before the insanity of the coming week (CAHSEE and a southern California college trip with 40 juniors), it was nice to get some girl time, eat too much yummy food, and be pampered.

My quiche was a surprise hit. The girls asked me to share my recipe, so here it is. There is enough dairy in it that I believe my cooking will make my Danish mother-in-law, Pam, proud. (I really do love butter too, Pam!) You've been warned.

Let's start with my no-fail pie crust. Making a perfectly flaky pie crust truly is an art (for a fun write up about it, check out my friend Anina's article here: http://www.hopedance.org/home/food-news/1836-by-anina-marcus), and this recipe (from Gourmet mag, I think) comes out of the oven buttery and flaky every time.

Pie Crust
2 1/2 cups unbleached All Purpose flour (I always use King Arthur brand or O Organics)
1 tsp. salt
2 Tbsp. granulated sugar (I buy organic evaporated cane juice)
13 Tbsp. cold, unsalted butter
7 Tbsp. vegetable shortening (I like Spectrum Organics)
7-8 Tbsp. ice water

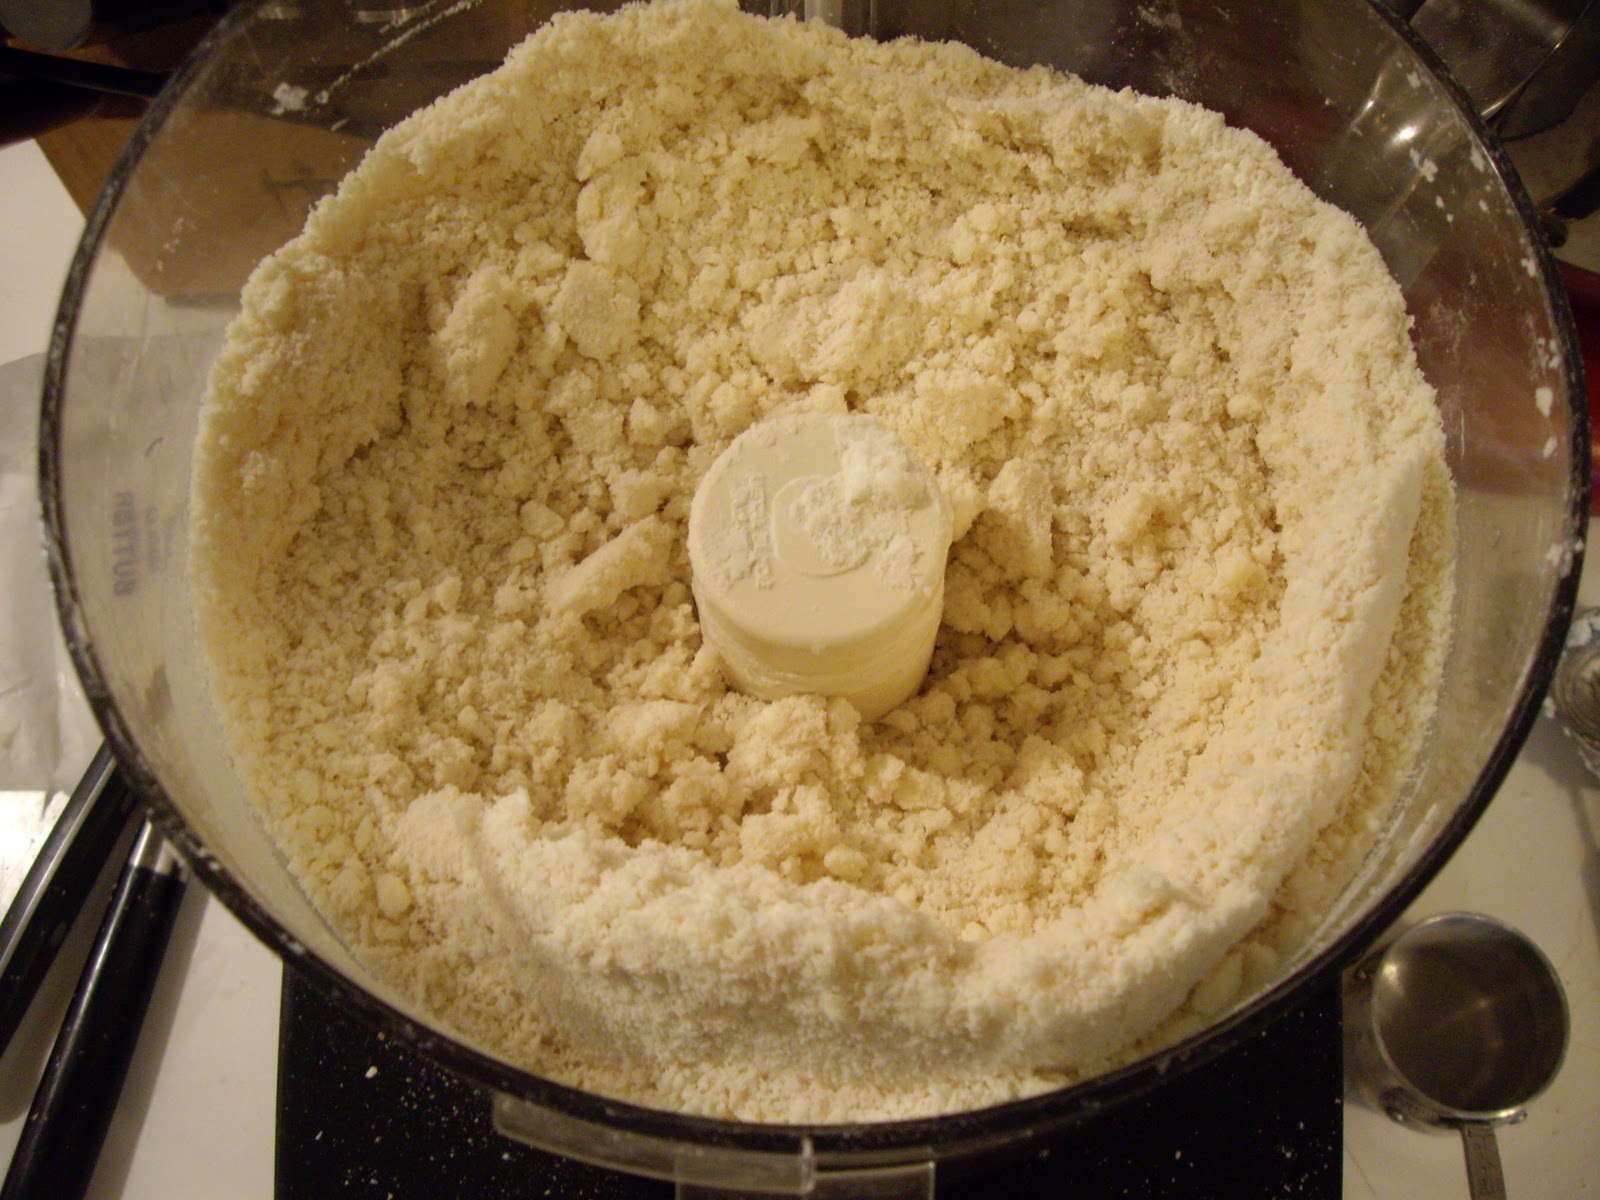
Mix flour, salt, and sugar in the bowl of a food processor fitted with a steel blade. Cut cold - not frozen - butter into small chunks and scatter over flour mixture.


Mix butter into flour with five 1 second pulses. Add shortening and continue pulsing until flour is pale yellow and resembles coarse corn meal, or until butter is no bigger than the size of small peas.


Add water and pulse until dough *just* comes together. (Here's the crucial step: the dough should come together when you pinch it, not crumble, but you don't want it to feel sticky like pizza dough. I suggest adding one Tbsp. of water at a time until dough has the right consistency.)


Note: This crust was too crumbly, so I had to throw it back in the food processor and add more water. No biggie. Oh, and this is where I stopped taking pics. Sorry. I still have to remind myself to stop and snap...

Turn mixture out onto a flat surface sprinkled with flour. Form dough into two disks and wrap in plastic wrap. Refrigerate for 30 mins or freeze for 5-10 mins before rolling.

A note on the importance of temperature: You want your dough to remain cold in between steps - and definitely before putting it in the oven - so your crust comes out flaky and not chewy. I refrigerate it before and after rolling, and I make sure not to pull my crust out of the fridge until I am absolutely ready to throw my ingredients in the quiche and put it in the oven.

Gently set dough into pie pan. Cut off excess crust and, you got it, stick it back in the fridge while you prepare the quiche filling.

Spinach, Mushroom (and Bacon) Quiche
12 pieces of thick-cut bacon (I like Neiman Ranch)
large handful spinach
handful mushrooms (I like cremini or baby portabellas for a little more flava', but buttons work too)
8 oz creme fraiche (I swear by Bellweather Farms)
6 eggs
1/2 tsp. salt
shredded Gruyere cheese (I eyeball it, so I am not sure how much I use, but I am liberal with it!)

Preheat the oven to 375 degrees. Cook bacon according to preference and crumble. Meanwhile, whisk eggs with salt and creme fraiche until well combined. Take your pie crust out of the fridge and add spinach, mushrooms, and finally bacon (if using), and pour egg mixture on top. (Don't worry, the eggs mixture won't cover your filling, but it will puff up as it cooks.) Sprinkle liberally with Gruyere.

Bake on a cookie sheet (to help the bottom get flaky) at 375 degrees for approximately 1 hour. The filling should not jiggle, the crust should be golden brown, the eggs should have puffed up, and the cheese should have melted and turned golden. (You can always cut into it to make sure the eggs are solid.) Remove from oven, let it set for 5 or so minutes, and enjoy. I make this dish for brunches and dinner. (In fact, we are having it tonight for dinner.) It really is divine any time of day. Happy eating!

P.S. Thanks for all the kind words about our plumbing. It was fixed on Friday, which allowed us to catch up on dirty dishes and three weeks of laundry this weekend. Hallelujah!

Wednesday, February 23, 2011

Coffee Toffee Cookies

I had planned on showing you around the master suite today, but unfortunately, a darn migraine thwarted my plans. (Migraine now averted, thankfully!)  So instead I thought I would share my recipe for Coffee Toffee Cookies. If you like Ben and Jerry's Coffee Heath Bar Crunch ice cream, then my friend, these cookies are for you.

Remember that empty cake stand from yesterday's post?


Well, the KitchenAid saw some action over the weekend and it is empty no longer! Here's the finished product:


And a close up...


Here's how to make them:

1/2 cup butter
3/4 cup brown sugar
1/4 cup granulated sugar
1 tablespoon coffee
1-1/4 cups flour
1/2 teaspoon baking soda
1/4 teaspoon salt
1 cup toffee pieces

Cream butter and sugar. Add coffee, beating until well combined. Slowly add the dry ingredients about a third at a time until all the flour is just blended. Do not overmix.

*Note: At the point, the dough will look more crumbly than other cookies you may have made because there are no eggs to bind the dough. Don't worry! It will all, literally, come together.

Add the toffee pieces until just combined.

Turn the dough out onto some plastic wrap and form into a log. (Here's where the dough should come together.) Wrap dough log - mmm, sounds appetizing huh? - in plastic wrap and freeze for 45 mins to refrigerate until cold, about 3 hours.

Cut into 3/8 inch thick rounds...


And bake at 325 degrees for 13 mins. (They will look a tad undone in the middle. That's okay, as they will continue to cook when you take them out of the oven, and you don't want them to flatten too much.)

Let them cool for about 5 mins and enjoy! Happy eating!

Tuesday, January 11, 2011

Chicken Enchiladas

I was introduced to this recipe by a roommate in college, and have made it so regularly over the years that I don't have it written down anywhere. It's high time to change that! I normally try to cook from scratch as much as possible, but these enchiladas are true comfort food, and except for the time it takes to cube or shred the chicken, it doesn't take long to throw together thanks to the short list of ready-made ingredients.

Ingredients
4 boneless, skinless chicken breasts (I like free range. What can I say? It's the granola girl in me.)
2 onions
1 small can of fire-roasted diced green chiles
8 oz sour cream (I use low fat)
1 can of cream of chicken soup (I use low fat)
6-8 flour tortillas
1 can enchilada sauce
1 small can sliced black olives
grated cheese (cheddar or jack works well)
salt and pepper to taste

Prep
Bring a large pot of water to boil. Add the chicken breasts and 1 quartered onion. Return to a boil for 20 minutes or until cooked through. Drain and cube or shred chicken. Set aside and discard the onion.

Finely dice the second onion and saute with some olive oil (in the same pot used to boil chicken) until the onions are translucent. Add cubed/shredded chicken, chiles, sour cream, and cream of chicken soup. Stir to combine.

At this point, preheat the oven to 350 degrees. Pour a thin layer of enchilada sauce into the bottom of a rectangular baking dish. Spoon the chicken filling into tortilla and gently place enchilada in the baking dish, folded side down. Continue until baking dish is full. Cover generously with enchilada sauce, then sprinkle with cheese and top with olives.

Bake for 30 minutes or until the cheese is bubbly and the edges of the tortillas are starting to crisp. Let it sit for 5 minutes before serving. (I like to serve it with some black or refried beans.)

Sorry the lack of photos. It doesn't photograph well, but it makes a mean leftover! We feasted on them for the last two nights and I still have a little leftover for lunch. Enjoy and please keep your fingers crossed that we pass inspection today!

Monday, January 3, 2011

New Years Recipes

I have taken the weekend to wallow in my funk over losing out on our first home offer. Delayed reaction, I suppose. I didn't post or really workout (except for a sweet afternoon walk in the rain with the hubs), and I barely cleaned, but I did do some reading and eating.

I have lost myself in Jonathan Franzen's The Corrections, which I am loving *almost* as much as Freedom. This is probably just the English teacher in me, but there is nothing in the world quite like a good book...


Except for some killer crab and double-layer brownies! So without further ado, here is what we grubbed on to ring in the 2011. It might just become a tradition! 

Dungeness Crab

Serves two people, so just double or triple the recipe as needed! 

Ingredients
1/4 c butter 
1/4 c olive oil
2 T minced garlic
1 T minced shallot
1 1/2 t dried crushed red pepper
2 large Dungeness crabs, cooked, cleaned, and cracked (about 4 1/2 lbs)
2 T chopped fresh thyme, divided
2 T chopped fresh parsley, divided
Salt and pepper to taste

2 blood or regular oranges to yield: 
1/2 c blood or regular orange juice
1 t finely grated blood or regular orange zest

Prep
Preheat oven to 500 degrees. Melt butter with oil in a heavy large ovenproof dutch oven or roasting pan over medium-high heat. Stir in garlic, shallot, and dried crushed red pepper. Add crabs and sprinkle with salt and pepper, if desired. Sprinkle one tablespoon each chopped thyme and parsley over crabs. Stir to combine. Place in oven and roast crabs until heating through, stirring once, about 12 minutes. 

Using tongs, transfer crabs to platter and loosely cover with aluminum foil. Add orange juice and zest to remaining sauce; boil until sauce is reduced by half, about 5 minutes. Spoon sauce over crabs. Sprinkle with remaining herbs and serve with a simple salad and some warm crusty sourdough bread.

Recipe and image courtesy of Epicurious

And now for some dessert! 

Espresso-Shortbread Brownie Bars

Ingredients
SHORTBREAD CRUST
1 stick plus 2 T unsalted butter, softened or melted
1 1/2 c all-purpose flour
1/4 c sugar
1 T finely ground espresso beans
1/2 t kosher salt

BROWNIE TOPPING
1 1/2 c all-purpose flour
2 T unsweetened cocoa
1 t kosher salt
1/2 t baking powder
1 stick plus 6 T unsalted butter 
4 oz unsweetened chocolate, chopped
2 c sugar
1 T pure vanilla extract
3 large eggs

Prep
  1. Make the shortbread crust: Preheat the oven to 350 degrees. In a food processor, combine the butter with the flour, sugar, ground espresso, and salt; pulse until coarse crumbs form. Press the crumbs into a 9 x 13 inch baking dish to form a crust. Freeze for 5 minutes. Prick all over with a fork and bake in the lower third of the oven for 30 minutes, until the crust is golden and cooked through.
  2. Prep brownie topping: In a medium bowl, combine the flour, cocoa, salt, and baking powder; set aside. In a double boiler, melt the butter with the chocolate over low heat. Remove the double boiler from heat and stir in the sugar and vanilla until combined, then stir in the eggs. Add wet ingredients to the dry ingredients and stir until the brownie batter is smooth. 
  3. Bake: Pour the brownie batter over the shortbread crust, smoothing the surface. Bake for 30 minutes, until the brownie top is dry and lightly cracked around the edges and an inserted fork comes out clean; the center will still be a bit soft. Let cool completely before cutting into bars. 
Recipe courtesy of Food & Wine, May 2010

Serve warm with some vanilla bean ice cream! Perfection.

Happy cooking and eating! I'll be back tomorrow with my resolutions for 2011. Stay tuned! 


Tuesday, December 21, 2010

Glam Granola Recipes

Welcome to my blog! I hope to share my exploits as I go from being a renter (of a sad little cottage), to a first time homeowner. Along the way, I intend to share what inspires me in the decor, food, and fashion worlds and adapt them into realities, at least in some form. 


But first, an explanation of the title of my new blog. Anyone that knows me knows that I make my own granola and have been for years. I eat it everyday with plain yogurt. It fills me up and powers me through my mornings so much, that I take it with me everywhere: to school where I munch on it in front of my poor students, to conferences (no muffins or pastries for me), and even on vacation. And of course, I get made fun of endlessly for this - until someone tries it and realizes that this is not your crunchy aunt's granola! So to honor the name of this blog, here are my two favorite granola recipes: 


The Original (inspired by the addictive La Brea Bakery granola)


3 c. old fashioned rolled oats
1/2 c. raw pumpkin seeds
1 c pecans
1 T ground cinnamon
2 t ground nutmeg
1/4 t orange peel
2 t pure vanilla extract
*Note: I add the spices by hand, but this is my closest approximation

Stir together with the following:
1/2 c. safflower oil
1/2 c. honey

Spread on a cookie sheet and bake for 16 minutes at 350 degrees, stirring once halfway through. Be careful about browning.

When light brown remove and let cool to room temp. Loosen from pan in chunks and add dried fruits. 
1/2 c. dried cranberries
1/2 c. dried blueberries
1/2 c. dried currants

Serve with yogurt and fresh fruit or with milk. It's not exactly the same as the inspiration, but the combination of spices and dried fruit make this my favorite during fall and winter. Yum!


The New Obsession (adapted from Joni Brosnan courtesy of GOOP)

2 c. old fashioned rolled oats
1 c walnuts
1 c pecans
1 c shredded coconut
1/2 c sunflower seeds
1/2 c flax seeds
Stir together with the following:
1/2 c. maple syrup (I like the maple agave blend from Trader Joe's)
1 T pure vanilla extract


Spread on a cookie sheet and bake for 25 minutes at 350 degrees, stirring once halfway through. Be careful about browning.

When light brown remove and let cool to room temp. Loosen from pan in chunks and add
1 c. dried cranberries
Serve in the same way as the Original Granola. The addition of the coconut makes this a delicious breakfast in the spring and summer. 
Recipe can be found at http://goop.com/newsletter/81/en/
Let me know if you try them. Happy baking and eating!